Deviant Anomalies
Play Deviant Anomalies
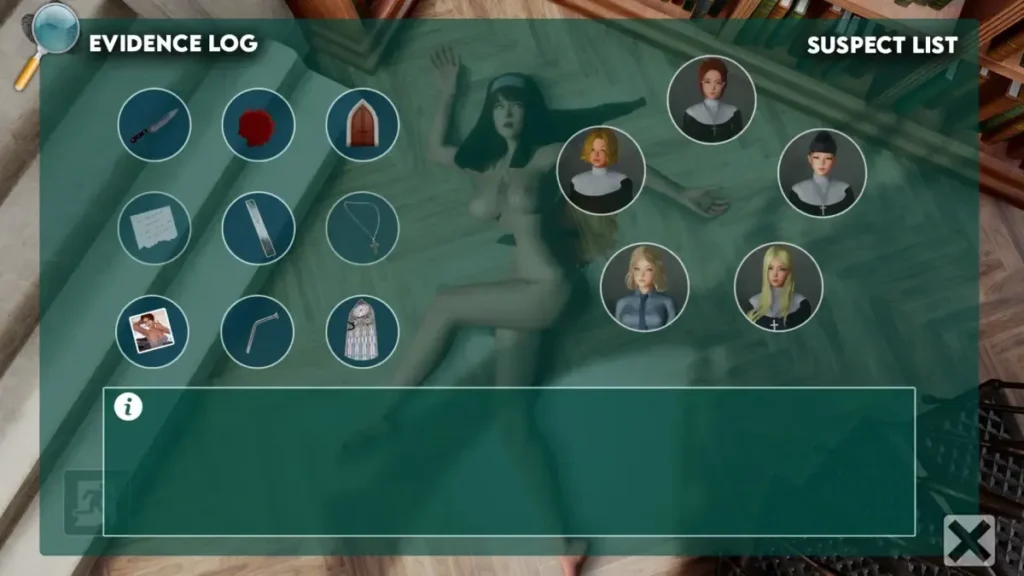
Deviant Anomalies Screenshots


Deviant Anomalies review
Master Quests, Characters, and Secrets in This Thrilling Adult Adventure
Ever stumbled into the shadowy world of Deviant Anomalies and felt lost in its web of seductive quests and mysterious cases? You’re not alone—I remember my first playthrough, fumbling through dimly lit bars and cryptic investigations, heart racing with every choice. This Deviant Anomalies guide is your roadmap to unlocking every steamy scene and recruiting key characters like Chanel, Beatrice, and more. Whether you’re tackling the 7-11 case or maxing out pleasure meters in recruitment mini-games, we’ll break it down step-by-step. Dive in, make smart picks, and transform frustration into triumph in this captivating adult game.
How to Conquer Core Quests in Deviant Anomalies?
Let me paint you a picture. There I was, staring at my screen, utterly stumped by the Deviant Anomalies 7-11 case. My wallet was empty, my leads were cold, and my detective was about as effective as a chocolate teapot. I’d blown my starting cash on the wrong gear and had no idea how to start Deviant Anomalies cases effectively. Sound familiar? 😅 If you’re feeling that early-game pinch, you’re not alone. The core Deviant Anomalies quests are brilliant puzzles, but they demand preparation, cunning, and a bit of know-how to crack.
This guide is the roadmap I wish I had. We’ll break down the essential investigations, from that infamous convenience store to the depths of a mysterious crypt. I’ll share the hard-earned tips that turned my playthrough from a frustrating grind into a thrilling power trip. Let’s dive in and master these cases together.
Mastering the 7-11 Case and Early Investigations
First things first: your traits. Don’t sleep on this choice! While “Business Acumen” is tempting for long-term grind money Deviant Anomalies strategies, “Keen Eye” is a godsend for early investigations. It highlights interactive points, making those initial Deviant Anomalies quests like the 7-11 case so much smoother. Trust me on this.
Now, for the 7-11 case walkthrough that had me stuck. This is your first real test. The goal is to investigate a suspicious clerk. You’ll need to buy a coffee and a pack of gum from the store to get the ball rolling. This is where many players (myself included) fail first—if you spent all your starting money on fancy tools, you can’t even begin! 🥤
Once inside, use your investigation skill on everything: the magazine rack, the counter, the clerk himself. The key moment comes when you must confront him. You have two main paths:
* Call Him Out Directly: This requires high enough evidence or stats. Risky, but fast.
* The Stare Down: My recommended choice. Simply select “…” and stare at him. It unnerves him, often leading to a confession without a difficult check.
Success here nets you a nice cash reward and, more importantly, opens up the city. Remember to save before this interaction in case your approach fails!
This case teaches the core loop: gather cash → take on PC cases for more money and clues → unlock main story beats. Don’t rush. Spend a day or two doing smaller PC cases after the 7-11 to build your funds for what comes next.
| Quest Phase | Required Actions & Items | Key Outcome / Tip |
|---|---|---|
| Initiation | Accept case from PC. Ensure you have at least $20. | No money? Do a quick PC case first. This is core to how to start Deviant Anomalies cases. |
| Store Investigation | Buy Coffee & Gum. Examine rack, counter, and clerk. | Use “Keen Eye” trait to spot all interactables easily. |
| Confrontation | Choose to stare (“…”) or call out based on your stats. | SAVE HERE. Staring is often the most reliable option. |
| Resolution | Collect reward from PC. Use funds for gear or new cases. | Your gateway to larger Deviant Anomalies quests is now open. |
Unlocking the Spear of Longinus Mystery Step-by-Step
Ah, the Spear of Longinus guide you’ve been searching for. This multi-part quest is where the game’s lore deepens significantly. It begins after establishing yourself with a few cases. You’ll receive a tip about strange activity at the local church—this is your starting pistol for one of the best Deviant Anomalies quests.
Phase 1: The Initial Church Visit
Your first Deviant Anomalies church investigation here is about subtlety. Go during the day. Talk to the priest—be polite and inquisitive. Examine the pews, the altar, and the strange, locked door to the side (often requiring a lockpick or key found later). The priest will be evasive. Your goal isn’t to accuse yet, but to notice everything. Take photos if you have a camera. The tension is palpable; he’s hiding something, and you both know it. 😶
Phase 2: Digging Deeper & The Interrogation
Return at night for the real scoop. This is where the Spear of Longinus guide gets critical. You’ll need to find a way into the restricted areas, often involving a mini-game or using a tool. Inside, you’ll discover clues linking the church to a relic black market.
Confront the priest with your evidence. This interrogation is a masterpiece of pressure. You can:
* Accuse Directly: Presents a stat check.
* Gradually Reveal Evidence: Wear him down piece by piece.
* Use Blackmail: If you took incriminating photos earlier, this is the perfect moment. It’s usually the safest path to a full confession.
Phase 3: Crypt Exploration
His confession points you to the crypt. This Deviant Anomalies crypt exploration segment is dark, literal, and figurative. You’ll need a flashlight. The puzzles here are environmental—pulling the correct sconces, reading epitaphs in sequence, avoiding simple traps. The atmosphere is thick with dread. Every shadow could hide a clue… or something else. 👻
At the end, you’ll face a choice about the relic itself, affecting your reputation and future quest lines. The Spear of Longinus guide culminates here, with a reward that’s both financial and deeply narrative.
Tips for Church Probes and Crypt Exploration
The church and crypt are the twin peaks of mid-game investigation. Here’s how to conquer them.
For the Deviant Anomalies church investigation, exhaust all dialogue options. Priests and acolytes have different knowledge levels. Come back at different times of day; nighttime investigations are riskier but yield more clues. When you get to the accusation scene, having multiple pieces of evidence is better than one. Blackmail is not just effective; it’s satisfyingly cinematic.
Pro Tip: Always save before attempting any lock-picking or bypass mini-game in the church. Failure can alert the inhabitants and lock you out of peaceful solutions.
The Deviant Anomalies crypt exploration is a test of observation. Your flashlight is your best friend. Examine every statue, every engraving, every broken tile. The clues to puzzles are always in the room prior. If you’re stuck, backtrack and look for scribbled notes or unusual markings you might have missed. The grind to afford good exploration gear (like a powerful flashlight or lockpick set) is worth it here—this is where that grind money Deviant Anomalies effort pays off.
My biggest insight? These quests overlap. While investigating the Spear of Longinus, you can pick up PC cases that send you to the same district. Always multitask. Need to grind money Deviant Anomalies style? Choose PC cases in areas related to your active main quest. You’ll earn cash and often stumble upon clues that advance your primary investigation, killing two birds with one stone. 🎯
Finally, if a particular puzzle or stat check has you truly stuck, there’s no shame in the strategic save-reload. The game is about the story and the thrill of the solve. If repeated failure is killing your buzz, save-scum your way past that one obstacle and enjoy the rest of the ride. Your fun is the ultimate priority.
To cement your progress, here are my top tips for building the resources you need to dominate these quests:
- Mix Main and PC Cases: Never do a main quest trip without checking for quick PC cases in the same area. Efficiency is key.
- Reinvest Your Earnings: Early game cash should go into core tools—a better camera, lockpicks, a reliable car. These pay for themselves.
- The “Keen Eye” Shortcut: Seriously, this trait saves hours of pixel-hunting, making early Deviant Anomalies quests far less frustrating.
- Nighttime Hustles: Some PC cases pay more at night but are riskier. Build your stats before regularly taking these on.
- Save Before Spending: About to buy a big-ticket item? Save first. Try it out. If it doesn’t help as much as you’d hoped, reload and keep your cash.
From the gritty 7-11 case to recruiting sultry characters like Beatrice and mastering those intense mini-games, Deviant Anomalies pulls you into a world of choices that pay off big. I’ve shared my stumbles and triumphs to help you avoid them—now it’s your turn to explore every shadowy corner. Grab your save file, hit the bar tonight, and unlock scenes that’ll keep you coming back. What’s your next quest? Dive in and let me know your wildest discoveries in the comments!